Generating Images with Artificial Intelligence: Midjourney Tutorial
Learn how to create stunning images with AI to transform the communication of your liberal practice ✅ DALL-E Tutorial | Midjourney | Lexica
Learn how to create stunning images with AI to transform the communication of your liberal practice ✅ DALL-E Tutorial | Midjourney | Lexica
The speed of development of artificial intelligence tools is impressive. You can quickly feel overwhelmed, so here is a tutorial to get started with image generation tools like DALL-E and Midjourney. These tools for generate high quality images Are not only Accessible, but can also respond to numerous professional issues.
Use AI-generated images Allows you to create custom visuals For your communication campaigns. Whether for Newsletters, conferences, webinars, blog posts Or publications on your social networks, of quality images can greatly improve theinvolvement And theimpact of your messages.
Les pictures are a key part of everything website. By generating your own visuals, you can insure a graphic coherence And a professional aesthetics, thus strengthening theimage of your office.
One Prompt Is a text instruction that you give to an AI for generate an image. La quality And the precision of this instruction largely determine the quality of the generated image.
Lexica is a platform where you can find AI-generated images, accompanied by Prompts used to create them. This allows you to:
.avif)
DALL-E is integrated directly into GPT chat (with paid subscription), allowing you to generate images quickly and easily.
Midjourney is renowned for the exceptional quality of his images. Although thesubscription Either to 20€ per month, it offers a interesting flexibility and the possibility of building images of rare quality.
Midjourney is the most effective platform for generating high quality images from text descriptions.
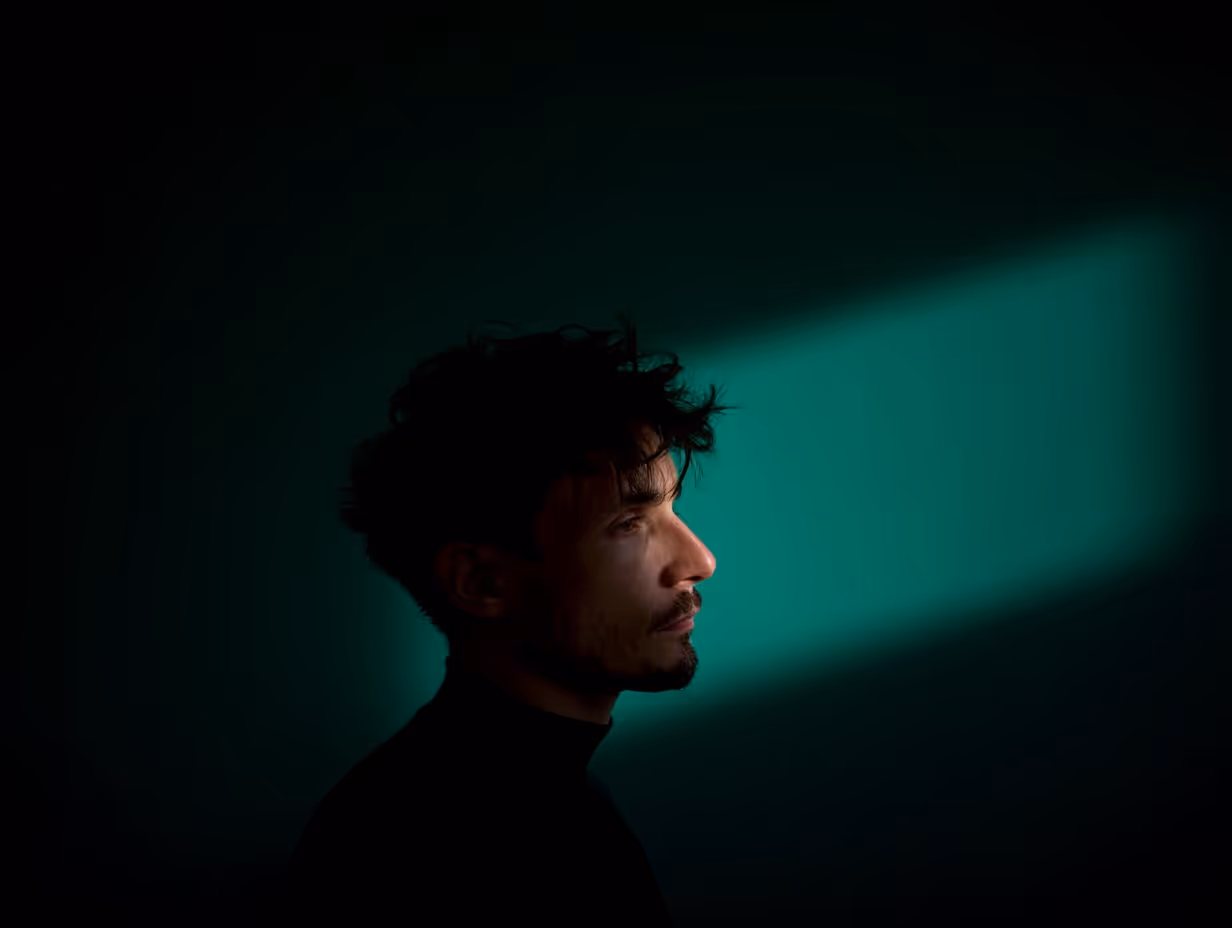
As said before, a Prompt is a detailed text description of the image you want to generate. For example, if you want an image of a consultant in a modern office, your prompt could be: “A young consultant with black hair and a short beard sits in his office at his desk, photo taken by Leica M6, realism”. The more accurate your prompt is, the closer the result will be to what you expect.
After submitting your prompt, Midjourney will generate four images in less than a minute. These images are based on the details you provided and offer different variations of your original description.
Once the initial four images are generated, you have several options for refining and improving these visuals:
Midjourney also allows you to start from a reference image. For example, if you have a photo of your team or offices, you can use that as a starting point. Midjourney will generate images based on this reference, while also incorporating the details from your prompt. This is particularly useful for creating visuals that match your visual identity or when you like a composition.
You cannot natively generate images of yourself, for that you must use a tool called Inswapper. A bit more technical to install, I'll leave you A doc here!
The Midjourney subscription is 20€ per month, but it offers interesting flexibility. You can:
Initially, Midjourney uses Discord for its user interface. Although this can be confusing for new users, the platform is working on a dedicated interface that is more intuitive and user-friendly. On Discord, you:
To better understand how this works, watch our video tutorial on the subject above!